
Vol. 2 Mother's Day Special DIY
Hi everyone and Welcome to our Second Edition of the Styling Edit.
I'm thrilled to share this new post for Mother's Day, it's my third time celebrating, but also my very first as a mom of two!
This new post features some very cool Aussie and overseas small brands as well as a little DIY idea that I found in Pinterest.
Bridging the Seasons: How to Style Summer Clothes with Wintery Elements
As winter edges closer and the air begins to turn crisp, many of us are reluctant to pack away our favourite summer pieces (Specially if you are from QLD or NT!!). The good news? You don’t have to. With a little creativity and layering know-how, your breezy summer wardrobe can seamlessly transition into the colder months. Here’s how to give your warm-weather favourites a cold-weather makeover.
1. Layer, Layer, Layer
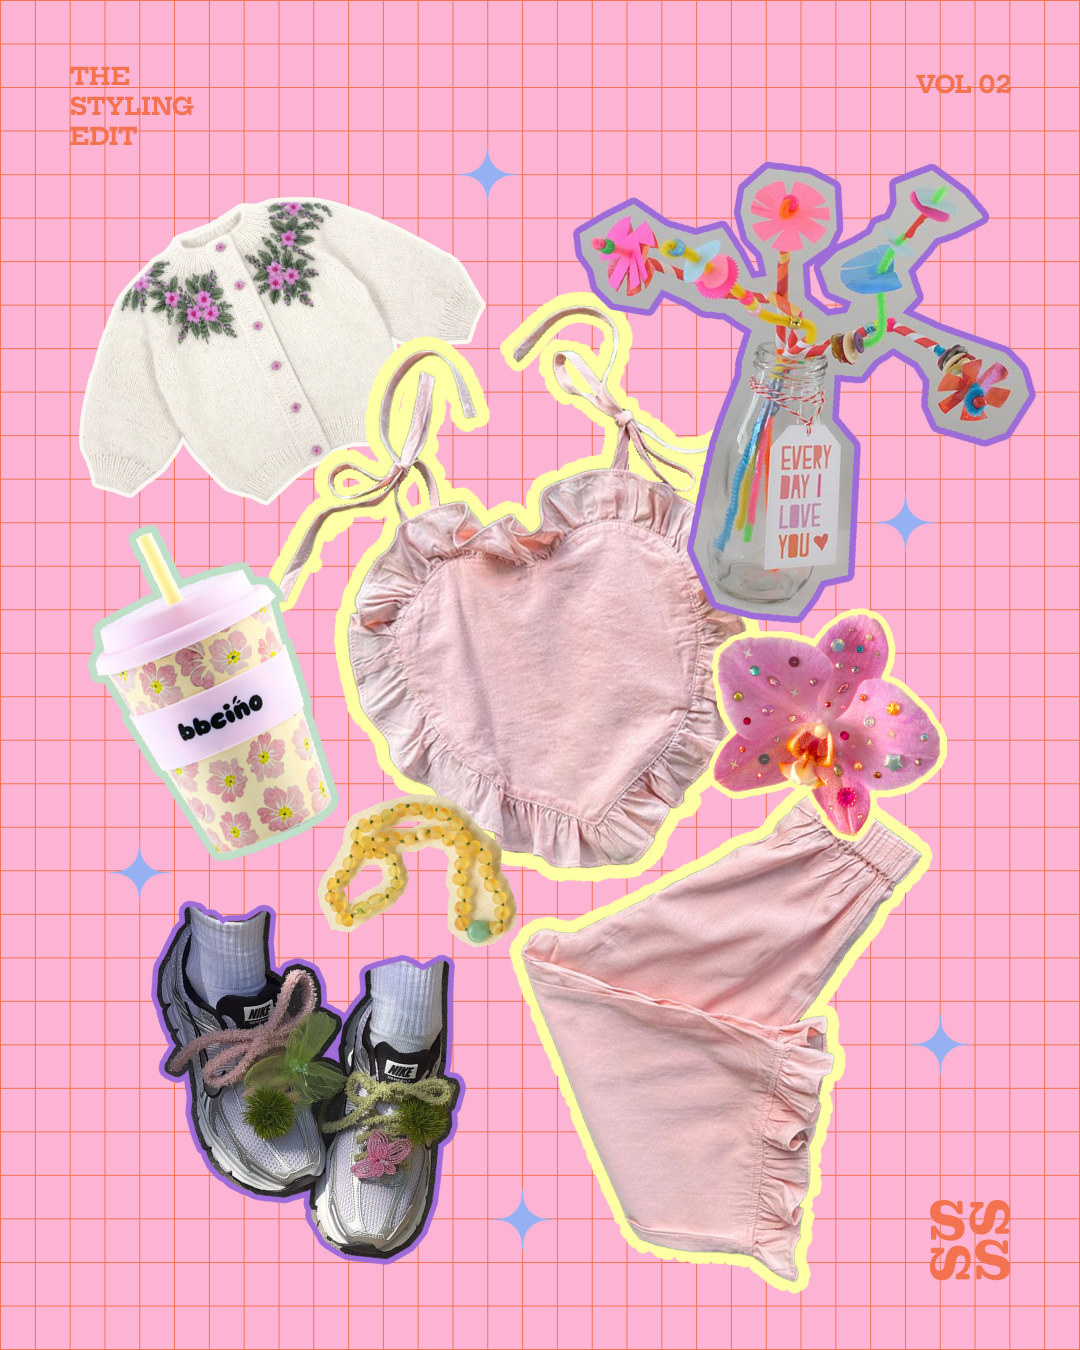
The key to mixing summer with winter is smart layering. Think of our beautiful Brown/Pink Heart Shaped Sets as base pieces. Add a chunky knit cardigan like this beauty from Portrait of a Moon or a tailored wool blazer on top, and you’ve instantly winterized the look. Don’t be afraid to mix textures—light cotton with thick fabrics creates a rich, cozy contrast.
2. Bring in Boots
Swap out sandals for ankle boots or some cool sneakers. Our Brown/Pink Heart Shaped Sets look completely new when paired with leather boots and some light warm tights for an extra layer underneath. Opt for neutral or earthy tones to ground the lightness of summer fabrics.
3. Play with Accessories
Cold-weather accessories like scarves and beanies not only keep you warm but also serve as stylish finishing touches. Wrap a plaid scarf over our Brown/Pink Heart Shaped Sets or a cool baseball cap .Instant seasonal fusion!
4. Add Structure with Outerwear
Throw a tailored coat, bomber, leather jacket, or even a trench over our Brown/Pink Heart Shaped Sets. Outerwear instantly adds warmth and polish, making your summer staples winter-ready in seconds. We love the jackets from Fille Garcon, they're so unique and cool!
6. Colour Matters
Introduce deeper, richer tones into your summer palette....think burgundy, forest green, navy, and rust creating a beautiful seasonal balance.
Final Thoughts
Transitioning your wardrobe doesn’t mean starting from scratch. With a few key swaps and clever pairings, your summer clothes can carry you gracefully into winter. It’s all about creativity, confidence, and finding new ways to express your style across seasons.
Happy layering!


DIY Blog: Whimsical Ribbon Flower Arrangement Inspired by Areum Florist
If you're looking for the perfect craft to make with your kids for Mother's day that blends playfulness with floral charm, look no further! This DIY ribbon flower arrangement, inspired by the whimsical design from Areum Florist, is fun, easy and it makes the best centre piece. With just a few simple supplies and a splash of imagination, you can recreate this joyful masterpiece at home with your little ones.
🌸 What You’ll Need:
-
A small clear or iridescent vase (or iridescent cellophane or holographic film to wrap it)
-
Silk, paper, plastic or the real flowers in vibrant colors (pinks, purples, yellows)
-
Assorted ribbons in pink, red, lime green, and pastel tones
-
Pipe cleaners (neon or glittery work best)
-
Craft paper or card for a decorative note
-
Cute embellishments (mini hearts, stickers, pearls, etc.)
- Double side tape or glue gun
- Siccors
🌼 Step-by-Step Instructions:
1. Prep Your Vase
Start by wrapping the outside of your vase with iridescent cellophane or holographic film for a dreamy base. Secure with tape or glue near the bottom and trim the excess. This creates a fun, shimmery foundation for your flowers.
2. Create the Floral Base
Take your silk or paper flowers and trim the stems to fit your vase. Arrange them in a loose, scattered formation to allow space for decorative elements. Don’t worry about symmetry—this look is all about cheerful chaos!
3. Add the Ribbons
Cut long strands of various ribbons and tie them around individual flower stems or glue them to pipe cleaners for height. Let some ribbons hang freely outside the vase, curling at the ends for extra movement.
4. Play With Pipe Cleaners
Bend colorful pipe cleaners into shapes—hearts, spirals, stars, or flower petals—and tuck them into the arrangement. This adds dimension and a childlike charm.
5. Personalise with a Note
Cut a small piece of card and let your kids decorate it with fun stickers, drawings, or a cute message and place it in the arrangement for that extra touch of love.
✨ Tips for a Magical Finish:
-
Don’t shy away from mixing textures—plastic, satin, glitter, and fabric all play well together here.
-
The more playful and unexpected, the better! Think pastel meets neon.
-
This arrangement makes a perfect gift for birthdays, Mother’s Day, or just a mood-lifting center piece.
Final Thoughts
This DIY flower arrangement is a celebration of color, creativity, and fun. Inspired by the beautiful work from Areum Florist, it invites you to break the floral "rules" and embrace joy in every detail. Whether you're a seasoned crafter or just dipping your toes into DIY, this project is the perfect activity to do with your sticker and ribbon lover kids for an special day. Happy Mother's Day. ❤️